
Mastering the Handgun: Fundamentals That Never Change
Shooting a handgun accurately is a perishable skill that demands consistent practice, proper technique, and an honest assessment of your own weaknesses. Whether you're picking up a pistol for the first time or looking to break through a performance plateau, the fundamentals of accurate handgun shooting remain constant regardless of the pistol you carry or the holster you use.
This comprehensive guide walks through every critical element of accurate handgun shooting—from the moment you pick up the pistol to the follow-through after the shot breaks. Master these fundamentals, and accuracy will follow. Neglect them, and no amount of expensive equipment will compensate.
Safety First: The Four Rules That Cannot Be Broken
Non-Negotiable Safety Fundamentals
Before touching on technique, every shooter—beginner or expert—must internalize the four universal firearm safety rules. These rules exist because accidents happen when people get complacent, and complacency with firearms has permanent consequences.
Rule 1: Treat Every Firearm as if It Is Loaded
Even when you've personally verified the chamber is empty, handle every firearm as though it could fire. This mindset prevents the casual handling that leads to accidents. There is no such thing as an "unloaded gun" in terms of how you handle it.
Rule 2: Never Point the Muzzle at Anything You're Not Willing to Destroy
Muzzle discipline is the most critical safety habit. The muzzle should always point in a safe direction—downrange, at the ground, or in a direction where an accidental discharge would cause no harm. This rule works in conjunction with Rule 1: if you treat every gun as loaded and never point it at anything you don't want to shoot, accidents become nearly impossible.
Rule 3: Keep Your Finger Off the Trigger Until Your Sights Are on Target and You've Made the Decision to Shoot
Trigger discipline is the most commonly violated safety rule, even among experienced shooters. Your trigger finger should rest straight along the frame, outside the trigger guard, until you are actively shooting. This is called "register" position. The moment your finger enters the trigger guard, you are committed to firing.
Rule 4: Know Your Target and What Is Beyond It
Bullets don't stop at the target. They penetrate, ricochet, and travel. Before firing, identify your target completely and understand what lies beyond it. This rule is especially critical in defensive scenarios where innocent bystanders may be present.
Understanding Your Handgun
Know Your Equipment Before You Shoot
Accurate shooting begins with understanding your specific firearm. Different action types require different techniques and mental approaches:
Striker-Fired Pistols (Glock, SIG P320, M&P, etc.):
- Consistent trigger pull every shot
- No external hammer to manage
- Most common modern carry pistol type
- Simpler manual of arms
- Trigger safety only (no external safety on most models)
Double-Action/Single-Action (Beretta 92, SIG P226, CZ 75):
- First shot: long, heavy double-action pull
- Subsequent shots: short, light single-action pull
- Requires managing two different trigger feels
- Often features decocker for safe carry
Single-Action Only (1911, Hi-Power):
- Hammer must be cocked for each shot
- Lightest, crispest trigger pull
- Requires manual safety engagement
- Preferred by many competition shooters
Read your owner's manual completely before your first range session. Understand how to load, unload, clear malfunctions, and field strip your specific pistol. Familiarity with your equipment is the foundation of safe, accurate shooting.
The Grip: Your Foundation for Everything
Why Grip Is the Most Important Fundamental
Of all the fundamentals in handgun shooting, grip has the greatest impact on accuracy and the most room for improvement in most shooters. A proper grip manages recoil, maintains sight alignment through the shot, and enables fast, accurate follow-up shots. A poor grip creates inconsistency that no amount of trigger work can overcome.
Establishing the Primary (Strong) Hand Grip
Step 1: High Grip
Place your strong hand as high on the backstrap as possible, with the web of your hand pressed firmly into the beavertail (if present) or the top of the grip. A high grip lowers the bore axis relative to your hand, reducing muzzle flip and felt recoil. Many shooters grip too low, leaving a gap between the web of their hand and the top of the grip—this is one of the most common grip errors.
Step 2: Trigger Finger Placement
The pad of your index finger (between the tip and first joint) should contact the trigger face. Using too much finger (past the first joint) causes the trigger to push sideways as it's pressed, pulling shots off target. Using too little finger (just the tip) reduces leverage and control. The exact placement varies slightly by hand size and trigger design, but the pad is the standard starting point.
Step 3: Remaining Fingers
Your middle, ring, and pinky fingers wrap around the grip with firm, consistent pressure. These fingers should grip the pistol like you're squeezing a firm handshake—not white-knuckle tight, but firm and consistent. Inconsistent finger pressure is a major source of shot-to-shot variation.
The Support Hand: Where Most Shooters Lose Points
The support hand does more work than most shooters realize. Properly applied, it manages recoil, stabilizes the pistol, and enables faster follow-up shots.
Support Hand Placement:
- Fill the gap left by your strong hand on the grip
- The heel of your support hand presses into the exposed grip panel
- Support hand fingers wrap over the strong hand fingers
- Thumbs point forward, roughly parallel to the slide
- Support hand thumb should NOT rest on the slide stop
The 60/40 Pressure Rule:
Apply approximately 60% of your grip pressure with the support hand and 40% with the strong hand. This counterintuitive distribution keeps the strong hand relaxed enough for smooth trigger manipulation while the support hand manages recoil. Many shooters do the opposite, gripping hard with the strong hand and light with the support hand—this creates trigger interference and poor recoil management.
Forward Pressure:
Push forward with the support hand while pulling back slightly with the strong hand. This isometric tension stabilizes the pistol and reduces muzzle movement. Think of it as trying to pull the pistol apart horizontally—the opposing forces create a stable platform.
Common Grip Errors
- Thumbs crossed: Support thumb behind slide causes painful slide bite
- Limp wrist: Insufficient grip pressure causes malfunctions
- Death grip: Excessive tension causes trembling and trigger interference
- Low grip: Leaves gap at top of backstrap, increases muzzle flip
- Inconsistent pressure: Shot-to-shot variation in grip causes group dispersion
Stance: Building a Stable Platform
The Two Primary Stances
Your stance provides the foundation from which your grip and trigger work operate. While stance matters less than grip and trigger control, a proper stance reduces fatigue, manages recoil, and enables faster target transitions.
Isosceles Stance
The isosceles stance is the most widely taught and used stance in modern defensive shooting:
Setup:
- Face the target squarely
- Feet shoulder-width apart, slight bend in knees
- Weight slightly forward on the balls of your feet
- Both arms extended equally toward the target
- Slight forward lean from the hips
- Head up, eyes forward
Advantages:
- Natural, intuitive body position
- Works well under stress (body naturally squares to threat)
- Excellent for target transitions
- Good for shooters wearing body armor
- Easy to teach and learn
Weaver Stance
The Weaver stance was the dominant technique for decades and still has advocates:
Setup:
- Bladed body position (strong side back)
- Strong arm extended, support arm bent
- Push-pull tension between arms
- Weight on front foot
- Slight crouch
Advantages:
- Presents smaller target profile
- Strong push-pull tension manages recoil
- Preferred by some for precision shooting
Modern Recommendation: Most contemporary instructors teach isosceles or a modified isosceles. Under stress, the body naturally squares to a threat, making isosceles more instinctive. However, the best stance is the one you've practiced most—consistency matters more than which stance you choose.
Sight Alignment and Sight Picture
The Visual Foundation of Accuracy
Understanding the difference between sight alignment and sight picture is fundamental to accurate shooting:
Sight Alignment: The relationship between your front sight and rear sight. Proper alignment means the front sight is centered horizontally in the rear sight notch with equal light on both sides, and the top of the front sight is level with the top of the rear sight.
Sight Picture: The relationship between your aligned sights and the target. Once your sights are aligned, you place that aligned sight picture on the desired point of impact.
Where to Focus Your Eyes
This is where many shooters make a critical error: your eyes cannot focus on three things simultaneously (rear sight, front sight, and target). You must choose where to focus, and the answer is almost always the front sight.
Front Sight Focus:
- Focus sharply on the front sight
- The rear sight will be slightly blurry—this is correct
- The target will be blurry—this is also correct
- A sharp front sight on a blurry target is accurate shooting
- A sharp target with a blurry front sight is inaccurate shooting
Exception—Red Dot Sights:
Red dot optics change this equation entirely. With a red dot, you focus on the target and place the dot on the desired point of impact. This is one reason red dots improve accuracy for many shooters—they allow target focus while maintaining a precise aiming reference. WARRIORLAND's SLL-100 laser/light combo for Glock 43X MOS and SLL-110G for Springfield Hellcat Pro provide additional aiming references that complement both iron sights and red dots.
Common Sight Alignment Errors
- High front sight: Shots impact high
- Low front sight: Shots impact low
- Front sight left of center: Shots impact left
- Front sight right of center: Shots impact right
- Target focus: Inconsistent sight alignment, scattered groups
Trigger Control: The Most Critical and Most Difficult Skill
Why Trigger Control Makes or Breaks Accuracy
You can have perfect grip, perfect stance, and perfect sight alignment—and still shoot poorly if your trigger control is bad. Trigger control is the act of pressing the trigger straight to the rear without disturbing your sight alignment. It sounds simple. It is not.
The Mechanics of Proper Trigger Press
The Press:
- Apply smooth, consistent rearward pressure on the trigger
- The press should be deliberate but not slow—smooth is fast
- Avoid jerking, slapping, or anticipating the shot
- The shot should surprise you slightly—this is called the "surprise break"
- Maintain sight alignment throughout the entire press
Trigger Finger Isolation:
- Only your trigger finger should move during the press
- Your grip hand should remain completely still
- Any sympathetic movement of other fingers disrupts sight alignment
- Practice isolating trigger finger movement in dry fire
The Reset:
- After the shot, allow the trigger to move forward only until you feel/hear the reset click
- Do not release the trigger fully between shots
- Short reset enables faster, more controlled follow-up shots
- Practice reset in dry fire until it becomes automatic
Diagnosing Trigger Problems with Shot Placement
Where your shots land tells you exactly what your trigger is doing wrong (for right-handed shooters):
- Shots low and left: Anticipating recoil, pushing trigger forward
- Shots low: Heeling—pushing the gun forward before the shot
- Shots left: Trigger finger pulling left during press
- Shots right: Trigger finger pushing right, or too much finger on trigger
- Shots high: Lifting the gun in anticipation
- Scattered shots: Inconsistent grip or trigger press
The Flinch Problem
Flinching—the involuntary anticipation of recoil—is the most common accuracy problem for shooters at all levels. The brain learns to anticipate the noise and recoil of the shot and begins moving the gun before the bullet leaves the barrel.
Diagnosing Flinch:
- Have a partner load your magazine with a dummy round at an unknown position
- When the hammer falls on the dummy round, observe what your gun does
- If the muzzle dips or the gun moves, you're flinching
- This is called a "ball and dummy" drill
Fixing Flinch:
- Dry fire extensively to build trigger confidence
- Shoot smaller calibers temporarily
- Focus on the surprise break
- Use laser sights for immediate feedback—WARRIORLAND's SLL-118G laser for Springfield Hellcat shows exactly where the muzzle moves during trigger press
- Slow down and focus on process, not results
Follow-Through: The Forgotten Fundamental
What Happens After the Shot Matters
Follow-through is the continuation of all fundamentals after the trigger breaks. Many shooters relax their grip, drop their eyes from the sights, or lower the gun the instant they hear the shot—before the bullet has left the barrel. This disrupts accuracy and slows follow-up shots.
Proper Follow-Through:
- Maintain sight alignment through and after the shot
- Keep your grip firm until the gun returns from recoil
- Call your shot—note where your sights were when the trigger broke
- Maintain trigger finger on trigger through reset
- Keep eyes on the front sight or red dot
Shot Calling:
Shot calling is the ability to know where your shot went before you see the hole in the target. If your sights were aligned on the center when the trigger broke, the shot should be center. If your sights were slightly left, the shot should be slightly left. Developing shot calling ability is a sign of advancing skill and requires maintaining focus through the shot.
Breathing and Timing
Managing Your Body's Natural Movement
Your body is never completely still. Heartbeat, breathing, and muscle tremor all create movement that affects accuracy. Managing these factors improves precision, especially at longer distances.
Breathing Control:
- For precision shots: exhale halfway and pause before pressing the trigger
- For defensive shooting: breathing matters less—focus on grip and trigger
- Don't hold your breath for extended periods—oxygen deprivation degrades performance
- Natural respiratory pause (between exhale and next inhale) is the optimal shooting window
Heartbeat Consideration:
- At precision distances, time shots between heartbeats
- For defensive distances, this level of precision is unnecessary
- Elevated heart rate from stress or exertion affects accuracy—train under physical stress
Drawing from a Holster
The Complete Draw Stroke
For concealed carriers, the draw stroke is as important as any other fundamental. A smooth, consistent draw gets your pistol on target quickly and safely. Practice this with an unloaded firearm until it becomes automatic.
The Four-Count Draw:
Count 1 — Grip:
- Establish your firing grip on the pistol while it's still in the holster
- Clear any cover garment with your support hand
- High grip, thumb on frame, trigger finger straight
- This is the most critical step—a poor grip here cannot be fixed later
Count 2 — Clear:
- Draw the pistol straight up until it clears the holster
- Rotate the muzzle toward the target
- Keep trigger finger straight along the frame
- Elbow drives back and up
Count 3 — Join:
- Bring the support hand to meet the strong hand
- Establish two-handed grip at chest level (retention position)
- This position allows shooting at close range if needed
Count 4 — Present:
- Push the pistol toward the target
- Acquire sight picture as the gun reaches full extension
- Trigger finger enters trigger guard only when sights are on target
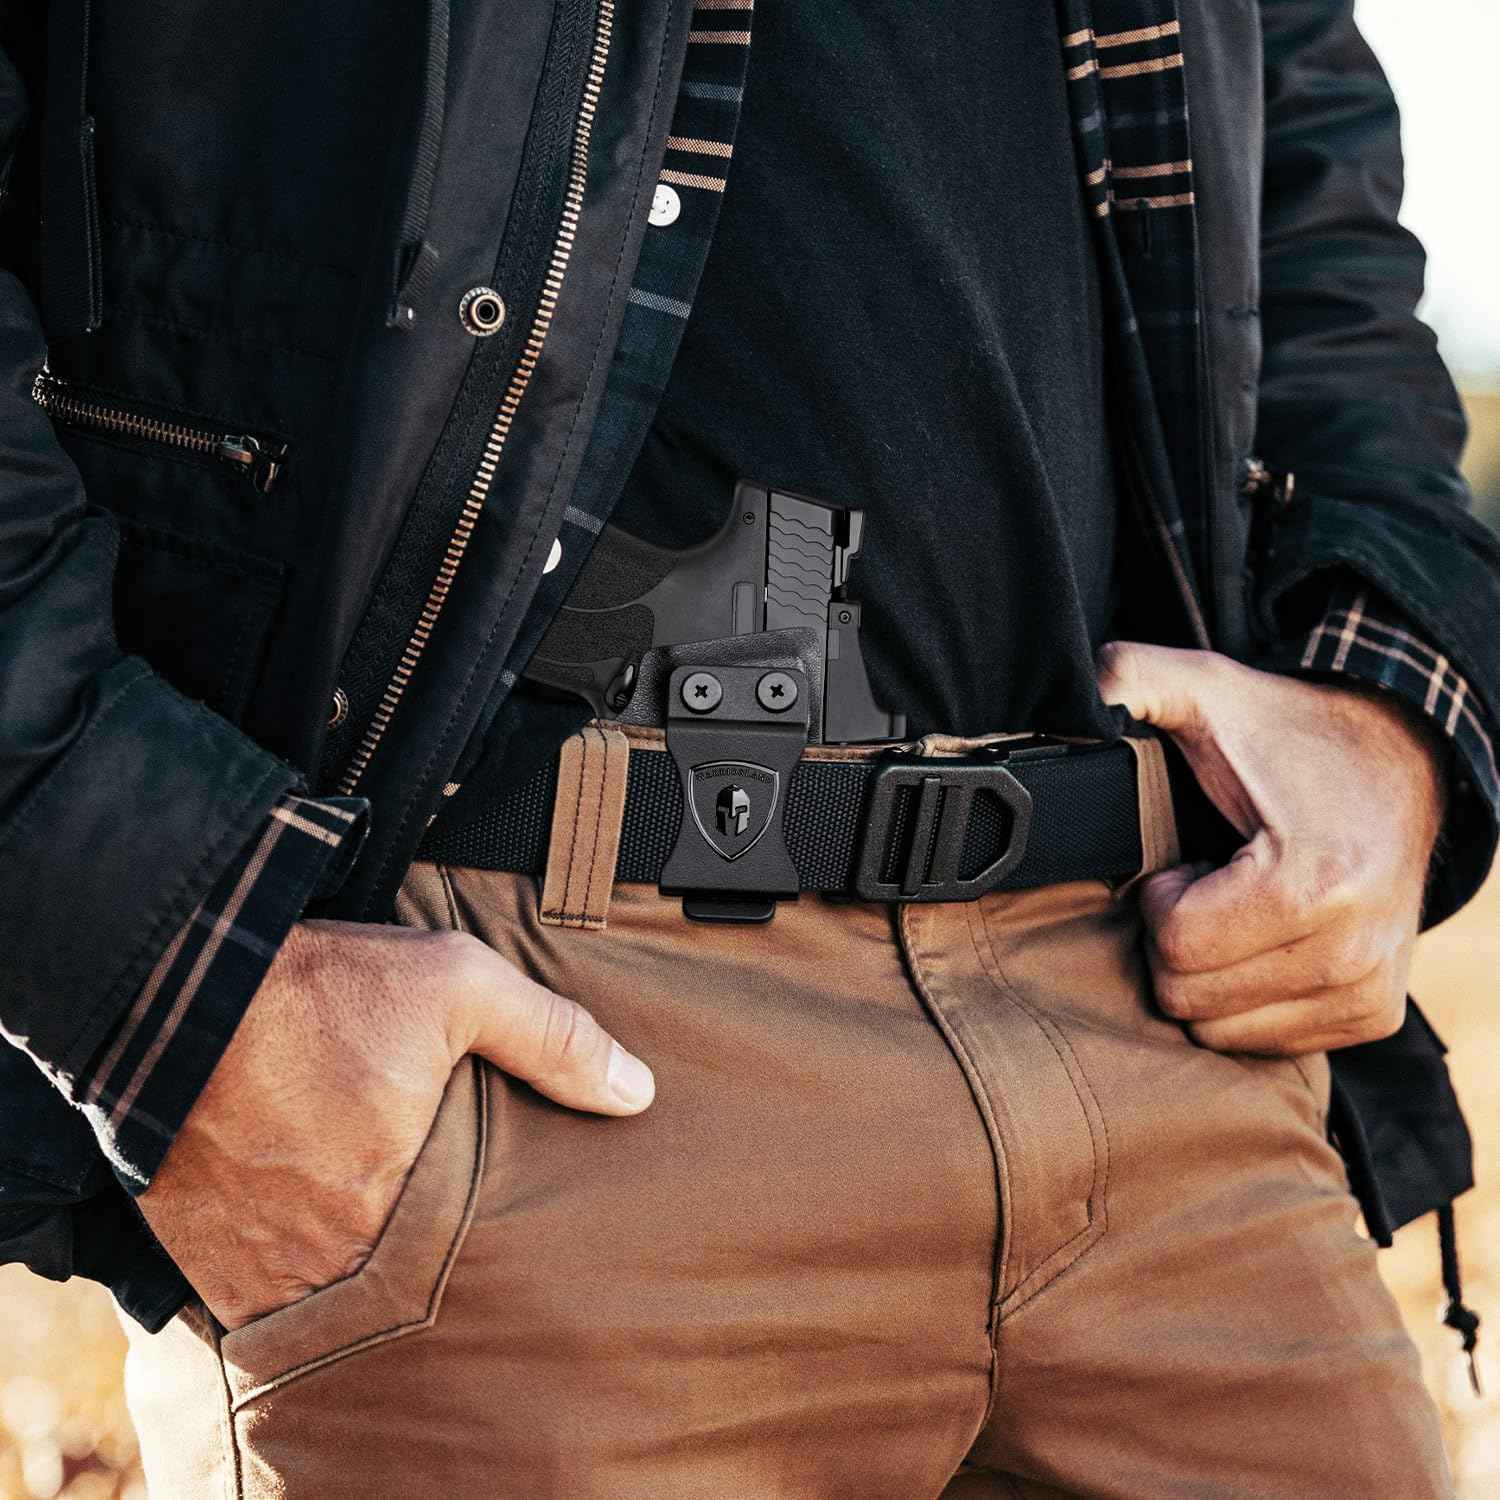
A quality holster is essential for a safe, consistent draw. WARRIORLAND's IWB hybrid holster for Glock 43/43X/48 and universal hybrid IWB holster provide the consistent retention and smooth draw that makes practice productive. The holster must hold the pistol securely during activity while releasing cleanly during the draw—cheap holsters fail at both.
Dry Fire: The Most Efficient Training Tool
Why Dry Fire Accelerates Skill Development
Dry fire—practicing with an unloaded firearm—is the single most efficient training tool available to pistol shooters. It's free, can be done at home, and allows unlimited repetitions of the fundamentals without the noise, cost, and range time of live fire.
What Dry Fire Develops:
- Trigger control without recoil distraction
- Draw stroke consistency
- Sight alignment habits
- Grip establishment
- Trigger reset awareness
- Malfunction clearance procedures
Dry Fire Safety Protocol:
- Remove all ammunition from the room
- Verify the chamber is empty—visually and physically
- Verify the magazine is removed
- Point in a safe direction (into a solid wall or backstop)
- Never mix dry fire and live fire in the same session without a complete reset
Laser-Assisted Dry Fire:
Laser sights dramatically improve dry fire effectiveness by providing immediate visual feedback on where the muzzle moves during trigger press. WARRIORLAND's SLL-100 laser combo shows exactly what your trigger is doing—if the laser dot jumps during the press, your trigger control needs work. This feedback loop accelerates improvement faster than any other training method.
Dry Fire Routine (15 minutes daily):
- 5 minutes: Draw stroke from holster
- 5 minutes: Trigger press and reset
- 5 minutes: Sight alignment and presentation
Live Fire Drills for Skill Development
Structured Practice Beats Casual Shooting
Going to the range and shooting at paper without a plan is entertainment, not training. Structured drills with specific goals accelerate skill development dramatically.
Fundamental Drills
The Dot Drill:
- Target: 1-inch dots at 3, 5, and 7 yards
- Goal: Place all shots within the dot
- Focus: Trigger control and sight alignment
- Start slow, increase speed as accuracy improves
The 5x5 Drill:
- 5 shots, 5 yards, 5-inch circle, 5 seconds
- From the draw
- All shots must be within the circle
- Excellent benchmark for defensive skill
The Bill Drill:
- 6 shots, 7 yards, IPSC A-zone
- From the draw, as fast as possible while maintaining accuracy
- Develops trigger speed and recoil management
- Par time goal: under 2 seconds
The Mozambique Drill (Failure Drill):
- 2 shots to the body, 1 shot to the head
- Develops target transition and precision under speed
- Important defensive skill
Magazine Management Drills
Reloading under pressure is a critical skill. Practice with a universal magazine carrier or platform-specific mag pouch to develop consistent, fast reloads:
- Emergency reload: Pistol runs dry, reload as fast as possible
- Tactical reload: Swap partial magazine for full magazine during a lull
- One-handed reload: Strong hand only, support hand only
Common Mistakes and How to Fix Them
The Most Frequent Errors
Mistake: Gripping Too Hard with the Strong Hand
Fix: Consciously shift pressure to support hand. Strong hand should be firm but not tense.
Mistake: Focusing on the Target Instead of the Front Sight
Fix: Consciously force your eye to the front sight. Use a target with a small aiming point to encourage front sight focus.
Mistake: Rushing the Shot
Fix: Slow down. Accuracy first, then speed. Speed comes from efficiency, not hurrying.
Mistake: Dropping the Gun After the Shot
Fix: Consciously hold the gun up and maintain sight picture for one full second after each shot.
Mistake: Inconsistent Grip Each Draw
Fix: Practice the draw stroke in dry fire until the grip is automatic. A quality holster like WARRIORLAND's Glock 43/43X IWB appendix holster presents the pistol consistently, making grip establishment easier.
Mistake: Neglecting Weak-Hand Shooting
Fix: Dedicate 20% of practice to support-hand-only shooting. In a defensive scenario, your strong hand may be injured or occupied.
Building a Training Program
Structured Improvement Over Time
Random practice produces random results. A structured training program produces measurable improvement:
Weekly Training Structure:
- Daily (15 min): Dry fire—draw stroke, trigger press, sight alignment
- Monthly (100-200 rounds): Live fire—fundamentals drills, timed exercises
- Quarterly: Professional instruction or structured course
- Annually: Defensive pistol course or competition
Tracking Progress:
- Record drill times and accuracy
- Photograph targets to track group size
- Note what worked and what didn't
- Set specific, measurable goals
Equipment That Supports Your Training
Gear That Makes Practice More Effective
The right equipment doesn't replace skill, but it supports skill development:
Quality Holster: Your holster must present the pistol consistently for every draw. WARRIORLAND's universal hybrid IWB holster fits multiple platforms and provides the consistent presentation that makes draw practice productive. For platform-specific precision, our Glock 43/43X/48 appendix hybrid holster offers adjustable cant and retention for personalized fit.
Laser Training Aid: Laser sights provide immediate feedback during dry fire. WARRIORLAND's SLL-110G green laser for Hellcat Pro shows exactly where the muzzle moves during trigger press—invaluable for diagnosing and correcting trigger problems.
Magazine Carriers: Practice reloads with a Glock 43X magazine carrier or universal magazine holster to develop consistent, fast reloads under pressure.
Eye and Ear Protection: Non-negotiable. Electronic earmuffs allow communication while protecting hearing. Quality shooting glasses protect against brass and debris.
Conclusion: The Path to Accurate Handgun Shooting
Accurate handgun shooting is a skill built on fundamentals—grip, stance, sight alignment, trigger control, and follow-through. These fundamentals don't change regardless of the pistol you shoot, the holster you carry, or the distance you're shooting. Master the fundamentals, and accuracy follows. Neglect them, and no amount of expensive equipment compensates.
The path to accuracy runs through consistent, structured practice. Dry fire daily. Live fire monthly. Seek professional instruction regularly. Track your progress honestly. Identify your weaknesses and address them specifically.
Equip yourself with tools that support your training—a quality holster from WARRIORLAND that presents your pistol consistently, laser sights that provide immediate feedback, and magazine carriers that enable realistic reload practice. The right equipment doesn't make you a better shooter, but it removes obstacles that prevent you from becoming one.
Start with the fundamentals. Practice them until they're automatic. Then practice them some more. The shooters who achieve genuine accuracy aren't those with the most expensive equipment—they're the ones who've put in the most deliberate, focused repetitions of the basics.