
Why Your Draw Stroke Is the Most Neglected Defensive Skill
Most concealed carriers spend their range time shooting at stationary targets from a ready position—pistol already in hand, sights already aligned. This is comfortable, inexpensive, and almost completely useless for developing real defensive capability. In an actual defensive encounter, your pistol starts in the holster. The draw stroke—the sequence of movements that gets your pistol from holster to target—is the skill that bridges the gap between carrying a firearm and being able to use it effectively.
Yet the draw stroke is the most neglected skill in most shooters' training. It's awkward to practice at many ranges, requires a quality holster, and demands focused repetition rather than the casual shooting most people do. This guide provides everything you need to develop a fast, safe, consistent draw stroke—from understanding why it matters to building a structured practice routine that produces real results.
The Case for Draw Stroke Training
What the Research Tells Us
FBI data on violent crime and defensive gun use consistently shows that most defensive encounters happen at close range, in low light, and with minimal warning. The attacker chooses the time and place; the defender reacts. This means the defender must go from condition unaware (or at best, condition alert) to having a pistol on target in the shortest possible time.
The Time Problem:
- An average person can close 21 feet in approximately 1.5 seconds
- A trained shooter can draw and fire an accurate shot in 1.0–1.5 seconds
- An untrained shooter may take 3–5 seconds or more
- The difference between trained and untrained is measured in lives
What This Means Practically:
- A slow draw gives an attacker time to close distance and neutralize your advantage
- A fast draw creates options that a slow draw eliminates
- Consistency matters as much as speed—a draw that works 95% of the time fails when you need it most
- The draw must work under stress, in the dark, with one hand, through a cover garment
Before You Begin: Safety Requirements
Non-Negotiable Safety Protocols
Draw stroke practice—especially dry fire at home—requires strict safety discipline. The combination of repetitive motion and familiarity breeds complacency, and complacency with firearms is dangerous.
Dry Fire Safety Protocol:
- Clear the firearm completely: Remove the magazine, lock the slide back, visually and physically verify the chamber is empty
- Remove all ammunition from the room: Not just from the gun—from the entire room. Ammunition and dry fire practice do not coexist
- Designate a safe direction: Point only at a solid backstop (exterior wall, bookcase filled with books) that would stop an accidental discharge
- Eliminate distractions: No phone calls, no conversations, no interruptions during dry fire
- Establish a ritual: Begin and end each session with a verbal declaration ("dry fire begins" / "dry fire ends") to prevent mixing live and dry fire
- Never answer the door or phone during dry fire: If interrupted, restart your safety check from the beginning
Live Fire Draw Safety:
- Only draw from a holster at ranges that explicitly permit it
- Never draw while others are downrange
- Keep finger off trigger until sights are on target
- Re-holster slowly and deliberately—never rush the holster
Choosing the Right Holster for Draw Practice
Why Your Holster Determines Your Draw
The holster is not a passive accessory—it actively shapes your draw stroke. A holster that collapses after the draw, shifts position during movement, or presents the pistol at an inconsistent angle makes developing a reliable draw stroke nearly impossible. Your holster must be rigid, stable, and positioned consistently every time you put it on.
Critical Holster Requirements for Draw Practice:
Rigid Mouth (Stays Open After Draw): When you draw the pistol, the holster mouth must remain open for re-holstering. Soft holsters, fabric holsters, and poorly constructed Kydex holsters collapse after the draw, requiring two hands to re-holster—a dangerous situation that forces you to sweep your own body with the muzzle.
Consistent Positioning: The holster must stay exactly where you put it, every time. A holster that shifts on the belt changes your draw angle and forces you to search for the grip rather than finding it automatically.
Appropriate Retention: Retention should be firm enough to keep the pistol secure during vigorous activity but release cleanly with a deliberate draw. Too loose and the pistol moves; too tight and the draw is slow and inconsistent.
Adjustable Cant: The angle at which the holster positions the pistol (cant) affects your draw angle. Different carry positions and body types require different cant settings. A holster with adjustable cant lets you optimize for your specific setup.
WARRIORLAND's holster lineup is engineered specifically for these requirements:
- Glock 17/19 IWB Hybrid Holster with Claw — Rigid Kydex shell stays open after draw, leather backing for all-day comfort, adjustable cant and retention
- Universal Hybrid IWB Holster — Fits Glock 17/19, SIG P320, Taurus G2C, M&P M2.0, Springfield, and more with optic cut and adjustable cant
- Glock 43/43X Hybrid Kydex & Nylon Holster — Slim profile for micro-compact draw practice with optics cut
- Hellcat Pro IWB Kydex Holster with Claw — Precision-molded for consistent draw presentation
Understanding Carry Positions and Their Draw Mechanics
How Position Shapes Technique
Different carry positions require fundamentally different draw mechanics. Before developing your draw stroke, understand the position you actually carry in—and practice exclusively from that position.
Strong-Side Hip (3–4 O'Clock)
The traditional carry position, strong-side hip carry is intuitive and works well for most body types:
Draw Mechanics:
- Strong hand sweeps back to find the grip
- Elbow drives back and up to clear the holster
- Muzzle rotates forward as pistol clears holster
- Support hand meets strong hand at chest level
- Both hands push toward target together
Advantages:
- Natural, intuitive motion
- Works well seated and standing
- Good for larger pistols
- Comfortable for extended carry
Challenges:
- Slower access when seated (seatbelt, desk)
- Requires cover garment management
- Can be difficult for larger body types
Appendix Inside Waistband (AIWB — 12–1:30 O'Clock)
Appendix carry has become the dominant carry position among serious concealed carriers for good reason—it offers the fastest draw, best concealment, and most secure retention:
Draw Mechanics:
- Strong hand drops straight down to grip
- Elbow drives back as pistol clears holster
- Muzzle rotates forward at waist level
- Support hand joins at chest level
- Shorter path to target than strong-side
Advantages:
- Fastest draw of any carry position
- Excellent concealment—grip stays close to body
- Easy to monitor holster retention
- Works well seated
- Natural body position protects holster
Challenges:
- Requires appropriate holster design
- Less comfortable for some body types
- Muzzle points toward body during holstering—requires careful technique
WARRIORLAND's Glock 43/43X appendix carry holster and Glock 23 appendix IWB holster are specifically designed for AIWB carry with the features that make appendix draw practice safe and effective.
Strong-Side Behind Hip (4–5 O'Clock)
Behind-the-hip carry offers deep concealment but a more complex draw:
Draw Mechanics:
- Strong hand reaches further back than strong-side
- More pronounced elbow drive required
- Longer path to target
- Excellent concealment under cover garments
Best For: Larger body types, those who sit frequently, shooters prioritizing concealment over draw speed
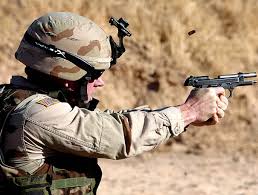
The Draw Stroke: Step-by-Step Breakdown
The Five Phases of a Complete Draw
Breaking the draw into distinct phases allows you to identify and correct specific problems. Practice each phase in isolation before combining them.
Phase 1: The Grip
Everything that follows depends on establishing a proper firing grip while the pistol is still in the holster. A poor grip at this stage cannot be corrected during the draw.
Execution:
- Strong hand moves directly to the pistol grip
- Web of hand presses high into the beavertail or top of grip
- Middle, ring, and pinky fingers wrap around the grip
- Trigger finger remains straight along the frame—never in the trigger guard
- Thumb points forward along the frame
Common Errors:
- Gripping too low on the backstrap
- Trigger finger entering the guard during the draw
- Inconsistent grip pressure
- Failing to establish full grip before drawing
Practice Drill: With an unloaded pistol in your holster, practice establishing your grip 20 times without drawing. Focus exclusively on grip quality. Your hand should find the same position every single time.
Phase 2: The Clear
Drawing the pistol straight up and out of the holster until it completely clears the retention device and holster mouth.
Execution:
- Drive the elbow back and up
- Draw the pistol straight up—not at an angle
- Clear the holster completely before rotating the muzzle
- Maintain trigger finger straight along the frame
Common Errors:
- Rotating the muzzle before clearing the holster (causes muzzle to catch)
- Drawing at an angle rather than straight up
- Insufficient elbow drive
- Rushing this phase and catching the holster
Phase 3: The Rotate
Once the pistol clears the holster, rotate the muzzle toward the target while keeping the pistol close to the body.
Execution:
- Rotate the muzzle forward until it points at the target
- Keep the pistol close to the body (retention position)
- This position allows shooting at contact distance if needed
- Support hand begins moving toward the pistol
Why Retention Position Matters:
- At contact distance, extending the pistol allows an attacker to grab it
- Retention position keeps the pistol close and protected
- You can fire accurately from retention at very close range
- Practice shooting from retention as a separate skill
Phase 4: The Join
Bringing the support hand to meet the strong hand to establish a two-handed grip.
Execution:
- Support hand moves to meet the pistol at chest level
- Establish full two-handed grip
- Support hand thumb points forward, not crossing behind slide
- Both hands grip firmly before presentation
Common Errors:
- Support hand crossing in front of the muzzle (extremely dangerous)
- Weak support hand grip
- Support thumb behind slide (causes slide bite)
- Rushing the join and getting a poor two-handed grip
Phase 5: The Present
Pushing the pistol toward the target while acquiring the sight picture.
Execution:
- Push the pistol toward the target from chest level
- Acquire sight picture as the pistol reaches full extension
- Trigger finger enters the trigger guard only when sights are on target
- Both arms reach full extension simultaneously
The Sight Picture Timing:
- Your eyes should be looking for the front sight as the pistol rises
- The sight picture should be there when the pistol reaches extension
- If you're searching for the sight picture after the pistol is extended, your presentation needs work
- A consistent draw produces a consistent sight picture
Cover Garment Management
The Real-World Complication
Most concealed carriers wear a cover garment—a shirt, jacket, or vest that conceals the holster. Drawing through a cover garment adds complexity and time to the draw stroke. This skill must be practiced specifically; it doesn't develop automatically from practicing without a cover garment.
Untucked Shirt or Jacket
The most common cover garment scenario:
Technique:
- Support hand sweeps the cover garment up and away from the holster
- Strong hand simultaneously moves to the grip
- Support hand clears the garment completely before joining the draw
- Practice the garment sweep as a separate motion before combining with the draw
Common Errors:
- Garment not cleared completely, catching on the pistol during draw
- Sweeping too slowly, adding unnecessary time
- Not practicing with the actual garments you wear
Tucked Shirt
Tucked carry requires a specific holster design and technique:
Technique:
- Requires a holster with clips that allow the shirt to be tucked over the pistol
- Strong hand grabs the shirt and rips it upward
- Simultaneously establish grip as shirt clears
- More complex and slower than untucked—practice extensively
Jacket or Vest
Technique:
- Support hand sweeps jacket open and back
- Strong hand moves to grip simultaneously
- Heavier garments require more aggressive sweep
- Practice with the specific jacket you carry in
Critical Point: Always practice with the actual clothing you wear. A draw that works perfectly in a t-shirt may fail completely in a winter jacket. Seasonal variation in clothing requires seasonal variation in practice.
Building Your Dry Fire Practice Routine
The Most Efficient Path to a Better Draw
Dry fire is the foundation of draw stroke development. It's free, can be done daily, and allows unlimited repetitions without the cost and logistics of range time. A shooter who dry fires 15 minutes daily will develop a better draw stroke than one who shoots live fire once a month.
The Progressive Dry Fire Approach
Week 1–2: Phase Isolation
Practice each phase of the draw separately before combining them:
- 10 reps: Grip establishment only (don't draw)
- 10 reps: Grip and clear (draw to retention, re-holster)
- 10 reps: Full draw to presentation (no trigger press)
- 10 reps: Full draw with trigger press and reset
Week 3–4: Integration
Combine all phases into a smooth, continuous motion:
- 20 reps: Full draw stroke, slow and deliberate
- Focus on smoothness, not speed
- Every rep should look and feel identical
- Add cover garment management
Week 5+: Speed Development
Once the motion is consistent, begin adding speed:
- Use a shot timer to measure draw time
- Gradually reduce time while maintaining technique
- Speed comes from eliminating wasted motion, not from rushing
- If technique degrades, slow down
Daily Dry Fire Routine (15–20 Minutes)
Warm-Up (5 minutes):
- 10 slow draws focusing on grip establishment
- 10 draws to retention position only
- Verify safety protocol before beginning
Main Practice (10 minutes):
- 20 full draw strokes with trigger press
- 10 draws with cover garment
- 10 one-handed draws (strong hand only)
- 5 draws from seated position
Cool-Down (5 minutes):
- 10 slow, perfect draws focusing on any identified weaknesses
- Re-holstering practice (slow and deliberate)
- Verbal declaration that dry fire session has ended
Live Fire Draw Practice
Translating Dry Fire to the Range
Live fire draw practice validates and stress-tests the technique developed in dry fire. The noise, recoil, and adrenaline of live fire reveal weaknesses that dry fire conceals.
Essential Live Fire Drills
The Par Time Drill:
- Set a shot timer to a par time (start with 3 seconds)
- Draw and fire one shot at a 3x5 index card at 5 yards
- Hit must be within the card
- Gradually reduce par time as accuracy allows
- Goal: 1.5 seconds or less for most defensive applications
The 3-Shot Draw Drill:
- Draw and fire 3 shots at an 8-inch circle at 7 yards
- All shots must be within the circle
- Measures draw speed and recoil management together
- Goal: Under 2.5 seconds
The Failure Drill from the Draw:
- Draw and fire 2 shots to the body, 1 to the head
- Develops target transition from the draw
- Measures both draw speed and accuracy under pressure
The Seated Draw:
- Practice drawing from a seated position (chair, car seat)
- Most defensive encounters happen near vehicles or in buildings
- Seated draw is significantly different from standing draw
- Requires specific practice
Using a Shot Timer
A shot timer is the most valuable training tool after the holster itself. It provides objective measurement of your draw time, eliminating the self-deception that comes from estimating speed.
How to Use a Shot Timer:
- Set to random start delay (prevents anticipating the beep)
- Record your draw time for every rep
- Track improvement over weeks and months
- Use par time function to set speed goals
- Don't obsess over single reps—look at averages
One-Handed Draw Techniques
When Your Support Hand Isn't Available
In a defensive scenario, your support hand may be occupied (holding a child, pushing someone away, injured) or unavailable. One-handed draw skills are not optional—they're essential.
Strong-Hand-Only Draw:
- Same grip establishment as two-handed draw
- Clear the holster and rotate muzzle toward target
- Present with strong hand only
- Grip must be especially firm to manage recoil
- Practice regularly—at least 20% of draw reps
Support-Hand-Only Draw:
- Cross-draw from strong-side holster, or
- Carry a second pistol on support side
- More complex technique requiring specific instruction
- Important for worst-case scenarios
Re-Holstering: The Overlooked Skill
Why Re-Holstering Deserves as Much Attention as Drawing
Most training focuses on the draw. Re-holstering receives almost no attention—yet it's where many negligent discharges occur. The urgency that drives a fast draw doesn't apply to re-holstering. There is never a reason to re-holster quickly.
Safe Re-Holstering Protocol:
- Verify the threat has been neutralized
- Scan for additional threats
- Keep finger straight along the frame—never in the trigger guard
- Look at the holster (it's acceptable to look during re-holstering)
- Guide the muzzle into the holster mouth
- Press the pistol down slowly and deliberately
- Verify the retention has engaged
Re-Holstering Dangers:
- Finger in trigger guard during re-holster (most common cause of negligent discharge)
- Cover garment caught in holster mouth (blocks re-holstering and can cause discharge)
- Collapsed holster mouth (requires two hands, forces muzzle sweep)
- Rushing the re-holster
This is why a rigid-mouth holster is non-negotiable. WARRIORLAND's Kydex holsters maintain their shape after the draw, allowing safe, one-handed re-holstering every time. Our Glock 17/19 IWB hybrid holster (brown) and universal hybrid IWB holster feature rigid Kydex shells that stay open for safe re-holstering regardless of how many times you draw.
Common Draw Stroke Problems and Solutions
Diagnosing and Fixing Specific Issues
Problem: Inconsistent Grip Establishment
Symptom: Different grip position on every draw, requiring adjustment after presentation
Fix: Slow down Phase 1 dramatically. Practice grip establishment 50 times daily without drawing. Your hand must find the same position automatically.
Problem: Catching the Holster During Draw
Symptom: Pistol catches on holster mouth or retention device during draw
Fix: Ensure you're drawing straight up before rotating. Check holster retention—may be too tight. Verify holster is positioned correctly on belt.
Problem: Slow Cover Garment Clearance
Symptom: Garment slows draw significantly or catches on pistol
Fix: Practice garment sweep as isolated motion. Ensure garment is appropriate for carry (not too tight). Consider different carry position or garment style.
Problem: Poor Sight Picture on Presentation
Symptom: Sights not aligned when pistol reaches extension, requiring adjustment
Fix: Focus on consistent presentation path. The pistol should travel the same path every draw. Practice presenting to a specific point on the wall in dry fire.
Problem: Trigger Finger Entering Guard Too Early
Symptom: Finger on trigger before sights are on target
Fix: This is a serious safety issue. Slow down completely. Consciously keep finger straight until sights are confirmed on target. Use verbal cue: "sights on target, finger on trigger."
Problem: Slow Draw Overall
Symptom: Draw time consistently above 2.5 seconds
Fix: Identify the slowest phase using video analysis. Eliminate wasted motion—every movement should have a purpose. Increase dry fire volume. Speed comes from efficiency, not rushing.
Selecting the Right Holster for Your Draw Practice
WARRIORLAND Solutions for Every Carry Style
Your holster is the foundation of your draw stroke. The wrong holster makes developing a reliable draw nearly impossible; the right holster makes it straightforward. WARRIORLAND offers precision-engineered options for every carry position and pistol platform:
For IWB Strong-Side Carry:
- Glock 17/19 IWB Hybrid Holster with Claw and Optic Cut — Rigid Kydex shell, leather comfort backing, adjustable cant for optimized draw angle
- Glock 17/19 IWB Hybrid Holster (Brown) — Same performance in classic brown leather aesthetic
For Appendix Carry:
- Glock 43/43X Appendix Carry Holster — Designed specifically for AIWB with trigger guard protection
- Glock 23 Appendix IWB Holster with Claw — Optic-cut appendix holster with concealment claw
- Ruger MAX-9 Appendix IWB Holster — Precision-molded for Ruger's micro-compact
For Multiple Platforms:
- Universal Hybrid IWB Holster — Fits Glock 17/19, SIG P320, Taurus G2C, M&P M2.0, Springfield, CZ, Ruger, and more
- Glock 43/43X Hybrid Kydex & Nylon Holster — Versatile micro-compact carry with optic cut
For OWB Range Practice:
- 1.75" OWB Paddle Holster — Stable platform for range draw practice
- Glock 17/19 OWB Kydex Holster — Rigid OWB for open carry and range use
Building a Long-Term Draw Stroke Development Plan
Month-by-Month Progression
Month 1: Foundation
- Daily dry fire: Phase isolation (grip, clear, rotate, join, present)
- Monthly live fire: 50 draws at 5 yards, no time pressure
- Goal: Consistent technique, no safety violations
Month 2: Integration
- Daily dry fire: Full draw stroke with cover garment
- Monthly live fire: 50 draws with par time (start at 3 seconds)
- Goal: Smooth, consistent draw under 2.5 seconds
Month 3: Speed Development
- Daily dry fire: Timed draws with shot timer
- Monthly live fire: Structured drills (par time, 3-shot, failure drill)
- Goal: Consistent draw under 2.0 seconds with accurate first shot
Month 4+: Maintenance and Refinement
- Daily dry fire: 15 minutes maintaining established technique
- Monthly live fire: Benchmark drills to track performance
- Quarterly: Introduce new challenges (low light, one-handed, seated)
- Goal: Sub-1.5-second draw with consistent accuracy
Conclusion: The Draw Stroke Is a Perishable Skill
The draw stroke is not a skill you develop once and retain forever. Like all motor skills, it degrades without practice. A shooter who trained extensively two years ago and hasn't practiced since does not have a reliable draw stroke—they have a memory of one.
The good news is that maintaining a draw stroke requires far less effort than developing one. Fifteen minutes of daily dry fire keeps the skill sharp indefinitely. The investment is small; the return—a reliable, fast, safe draw stroke when you need it most—is incalculable.
Start with safety. Build your foundation with phase isolation. Develop consistency before speed. Practice with your actual carry holster, your actual carry position, and your actual carry clothing. Use a quality holster from WARRIORLAND that presents your pistol consistently and re-holsters safely—because the holster is not just where your pistol lives, it's the foundation of your most critical defensive skill.
Explore WARRIORLAND's complete holster lineup for IWB carry, appendix carry, and multi-platform solutions. The right holster makes the right draw possible. Train consistently, train safely, and carry with confidence.